
Introduction to DIY Desk Building
If you’re looking to add a personal touch to your home office or workspace, building your own desk can be a rewarding and cost-effective project. Building a DIY desk allows you to customize the design, size, and materials to suit your specific needs and preferences. In this section, we will explore the benefits of building your own desk and the tools and materials you’ll need to get started.
Benefits of Building Your Own Desk
Building your own desk offers a range of benefits that make it an attractive option for many DIY enthusiasts. Here are a few advantages to consider:
- Cost Savings: Building your own desk can be more budget-friendly compared to purchasing a pre-made desk. You have control over the materials used, allowing you to choose a cost-effective option without compromising on quality.
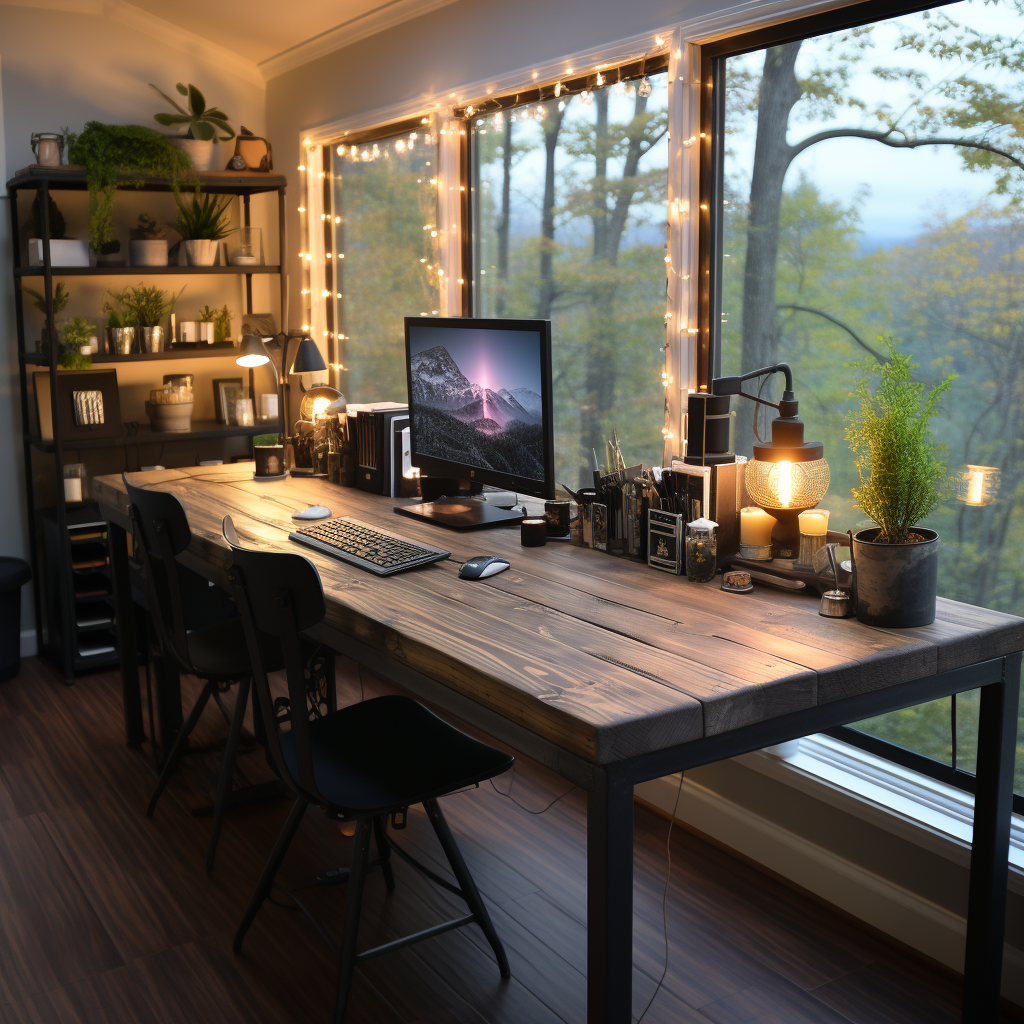
- Customization: When you build your own desk, you have the freedom to customize every aspect. You can choose the size, shape, and style that best fits your space and personal taste. This ensures that your desk perfectly aligns with your needs and enhances the overall aesthetics of your room.
- Quality and Durability: By handcrafting your own desk, you have the ability to select high-quality materials and ensure sturdy construction. This can result in a desk that is more durable and long-lasting compared to mass-produced options.
- Functional Design: Building your own desk allows you to incorporate specific features and functionalities that cater to your unique requirements. You can add storage options, cable management solutions, or even design a multi-purpose desk that suits your workflow.
Tools and Materials You’ll Need
Before you embark on your DIY desk-building journey, it’s important to gather the tools and materials necessary for the project. While the specific requirements may vary depending on the design and complexity of your desk, here are some general tools and materials you’ll likely need:
| Tools Needed | Materials Needed |
|---|---|
| Measuring Tape | Plywood or Solid Wood Boards |
| Saw (Circular Saw or Miter Saw) | Screws and Nails |
| Drill or Screwdriver | Wood Glue |
| Sandpaper or Sander | Varnish, Paint, or Stain |
| Clamps | Drawer Slides (if adding drawers) |
| Level | Drawer Knobs or Pulls (if adding drawers) |
It’s important to have the necessary tools and materials ready before you begin your DIY desk project. This ensures a smooth and efficient construction process. If you need guidance on how to make a table taller, check out our article on how to make a table taller DIY for helpful tips and instructions.
Now that you understand the benefits of building your own desk and have an idea of the tools and materials required, it’s time to move on to the planning phase. In the next section, we will explore how to determine the size and design of your DIY desk and choose the right materials for the project.
Planning Your DIY Desk
Before you start building your own desk, it’s important to spend some time planning and considering key factors such as the size and design of the desk, as well as the materials you will use.
Determining the Size and Design
The first step in planning your DIY desk is to determine the size and design that will best suit your needs and available space. Consider the purpose of the desk and how you will be using it. Will it primarily be used for computer work? Will you need additional storage space? By answering these questions, you can determine the dimensions and features that will be most beneficial to you.
Make sure to measure the area where the desk will be placed to ensure it fits properly. Consider the height of the desk as well, as you want it to be comfortable for you to work at. If you’re unsure about the ideal desk height, you can refer to our article on how to make a table taller DIY for guidance.
When it comes to the design of the desk, take into account your personal style and preferences. You can opt for a simple and minimalist design or get creative with unique shapes and finishes. Look for inspiration in magazines or online platforms to find a design that resonates with you. Remember, the goal is to create a desk that not only serves its purpose but also adds to the aesthetics of your space.
Choosing the Right Materials
The choice of materials will greatly influence the durability and appearance of your DIY desk. Consider the following options when selecting materials for each component of the desk:
| Component | Material Options |
|---|---|
| Desk Surface | Plywood, solid wood, laminate |
| Desk Frame | Wood, metal |
| Legs or Supports | Wood, metal, hairpin legs |
When choosing materials, keep in mind factors such as budget, availability, and your skill level in working with different materials. Plywood and solid wood are popular choices for the desk surface, offering a sturdy and durable foundation. Laminate can be a more budget-friendly option that still provides a sleek and polished look.
For the desk frame and legs, wood and metal are both viable choices. Wood provides a warm and natural aesthetic, while metal offers a modern and industrial look. Hairpin legs are a popular option for their simplicity and versatility. Consider the weight and stability of the materials to ensure your desk is sturdy and secure.
Remember to take safety precautions when working with power tools and follow proper handling and assembly techniques.
By carefully planning the size and design of your DIY desk and selecting the right materials, you can create a functional and stylish workspace that suits your needs and reflects your personal style. Get inspired, gather your tools and materials, and get ready to embark on the rewarding journey of building your own desk.
Step-by-Step Guide to Building Your DIY Desk
Building your own desk can be a rewarding and cost-effective project. With a few basic tools and materials, you can create a customized desk that suits your needs perfectly. Follow this step-by-step guide to bring your DIY desk to life.
Step 1: Measuring and Cutting the Desk Components
Start by measuring and cutting the components of your desk. Measure the desired height, width, and depth of your desk. Mark these measurements on the wood or other material you’ve chosen for your desk. Use a saw or a suitable cutting tool to carefully cut the pieces according to your measurements.
| Desk Component | Measurement |
|---|---|
| Desk Legs | Height: X inches |
| Desk Frame | Width: Y inches Depth: Z inches |
| Desk Surface | Width: Y inches Depth: Z inches |
Ensure that all the pieces are cut accurately and match the intended dimensions. Precision at this stage will ensure a sturdy and well-fitting desk.
Step 2: Assembling the Desk Frame
Once the components are cut, it’s time to assemble the desk frame. Lay out the desk legs and connect them with the desk frame pieces using screws or appropriate fasteners. Make sure to align the pieces properly and tighten the fasteners securely.
If you’re unsure about the assembly process, refer to the manufacturer’s instructions or seek guidance from experienced DIYers. Safety should always be a priority when using tools and assembling furniture.
Step 3: Attaching the Desk Surface
After the desk frame is assembled, it’s time to attach the desk surface. Place the surface on top of the frame and secure it in place. Depending on the material you’re using, you may need to use screws, brackets, or adhesive to secure the surface to the frame. Ensure that the surface is level and securely attached.
Step 4: Sanding and Finishing the Desk
To give your DIY desk a polished look, sand the entire surface to smooth out any rough edges or imperfections. Use sandpaper with a medium grit to start, and then switch to a finer grit for a smoother finish. After sanding, wipe away any dust or debris.
Consider applying a finish or stain to protect the desk surface and enhance its appearance. Follow the manufacturer’s instructions for the specific finish or stain you choose. Allow the finish to dry completely before using the desk.
By following these step-by-step instructions, you can build your own desk and enjoy the satisfaction of creating a functional piece of furniture. Remember to take safety precautions, use appropriate tools, and refer to the manufacturer’s instructions when necessary. Enjoy the process of building your DIY desk and take pride in the finished product!
Customization and Personalization
Building your own DIY desk gives you the freedom to customize and personalize it to your liking. Here are some options to consider when adding your personal touch to your desk.
Adding Storage Options
To maximize the functionality of your DIY desk, you can incorporate storage options that suit your needs. This could include adding drawers, shelves, or compartments to keep your workspace organized and clutter-free. Consider the size and layout of your desk to determine the best storage solutions for your specific requirements. For more inspiration on adding storage to your DIY projects, check out our article on how to make a table taller DIY.
Painting or Staining the Desk
One of the most effective ways to personalize your DIY desk is by painting or staining it. You can choose a color or finish that complements your existing decor or matches your personal style. Before painting or staining, ensure that you properly prepare the surface by sanding it down and applying a primer, if necessary. This will help the paint or stain adhere better and result in a more professional-looking finish. For more tips on DIY furniture painting, check out our article on how to DIY a coffee table.
Adding Finishing Touches
To truly make your DIY desk unique, consider adding finishing touches that reflect your personality and taste. This could include attaching decorative hardware, such as knobs or handles, that add a touch of elegance or whimsy. You could also incorporate cable management solutions to keep your cords organized and out of sight. Additionally, consider adding a desk mat or a personalized mousepad to protect the surface and add a personal touch. For more ideas on how to customize your desk, take a look at our article on how to make a DIY beer pong table.
By adding storage options, painting or staining the desk, and incorporating finishing touches, you can create a DIY desk that not only meets your functional needs but also reflects your personal style and taste. Remember to take proper safety precautions when working with tools and materials, and regularly maintain and care for your DIY desk to ensure its longevity. For more tips on home improvement and DIY projects, visit our website.
Tips and Safety Considerations
When embarking on a DIY desk building project, it’s important to prioritize safety and take certain precautions. This section provides tips and guidelines for working with power tools, proper handling and assembly techniques, as well as maintenance and care for your DIY desk.
Working with Power Tools
- Read the manual: Familiarize yourself with the user manual for each power tool you’ll be using. Follow the manufacturer’s instructions regarding setup, operation, and safety precautions.
- Wear protective gear: Always wear appropriate protective gear, such as safety glasses, ear protection, and gloves, when operating power tools. This helps to prevent injuries from flying debris, loud noise, and accidental contact.
- Use clamps and guides: Secure your workpiece with clamps or guides to keep it steady while cutting or drilling. This helps to ensure accurate and safe operation.
- Keep a clean workspace: Maintain a clean and clutter-free workspace to prevent tripping hazards and allow for easy movement during the construction process.
- Inspect tools and cords: Regularly inspect your power tools and cords for any signs of damage. Replace or repair them as necessary to prevent accidents and electrical hazards.
Proper Handling and Assembly Techniques
- Follow plans and measurements: Carefully follow your desk plans and double-check all measurements before cutting or assembling any components. This helps to avoid mistakes and ensures a properly constructed desk.
- Use the right fasteners: Select appropriate screws, nails, or other fasteners for your desk assembly. Ensure they are the correct size and type for the materials you’re working with.
- Use a level and square: Use a level to ensure your desk is properly aligned and a square to check for right angles during assembly. This helps to achieve a sturdy and balanced desk.
- Ask for assistance if needed: If your desk construction requires heavy lifting or if you’re unsure about certain tasks, don’t hesitate to ask for help. It’s better to work safely with assistance than risk injury.
Maintenance and Care for Your DIY Desk
- Regular cleaning: Clean your desk regularly with a soft cloth or mild cleaning solution suitable for the desk material. Avoid using abrasive cleaners that may damage the surface.
- Avoid excessive weight: Be mindful of the weight you place on your desk to prevent it from sagging or breaking. Consider adding reinforcements or additional support if necessary.
- Protect the surface: Use coasters or desk pads to prevent scratches, stains, and heat damage from hot objects like mugs or laptops.
- Check for stability: Periodically check the stability of your desk, especially if it’s made from wood. Tighten any loose screws or bolts and make any necessary adjustments to maintain stability.
By following these tips and safety considerations, you can ensure a safe and successful DIY desk building experience. Remember to always prioritize safety, use appropriate protective gear, and follow proper handling techniques when working with power tools. With proper care and maintenance, your DIY desk will provide you with a functional and personalized workspace for years to come.